| << Step 7: Positioning the text block | Step 9: Importing text >> |
| Top: Documentation Library | Up: Lesson 2: Designing a Menu |
Step 8: Creating multiple text columns
The guides you need to create this menu are already created. The margin guides define the edges of the layout, and column guides which divide the layout into a columnar grid.
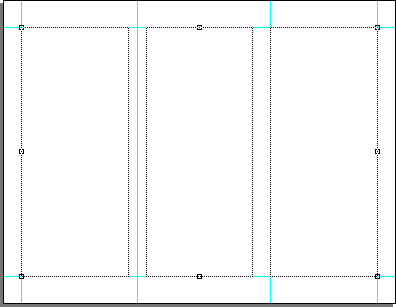
In this step, you will create a three column text frame. Go to page 2, using the ''Next Page'' button. Choose ''Show Full Page'' from the ''View'' pop-up menu if the entire page is not already visible.
1. Choose ''Create Text Frames'' from the ''Layout'' menu.
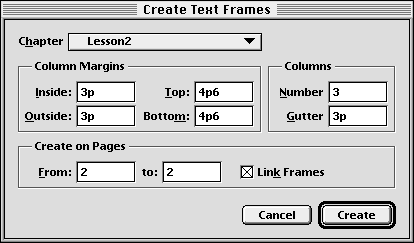
The ''Create Text Frames'' dialog box will open.
2. Set the column options.
Change the column options using the example below.
- Column Guides:
- Inside: 3p
- Outside: 3p
- Top: 4p6
- Bottom: 4p6
- Inside: 3p
- Column Guides:
- Columns: 3
- Gutter: 3p
- Columns: 3
- Pages:
- From: 2
- To: 2
- From: 2
Click on ''Create'' to create the text column.
 | You can also create a 1, 2, or 3 column text frame with the ''Column tool'' in the ''Toolbox''. |
Step 8: Creating multiple text columns Sub-Section url:PGSuser/lesson2#step8
created:2006-04-14 14:31:17 last updated:2019-12-19 17:03:05
Copyright © 1985-2026 GrasshopperLLC. All Rights Reserved.
| User Contributed Comments For Step 8: Creating multiple text columns | sign in to add a comment |
| There are no user contributed comments for this page. | |
| << Step 7: Positioning the text block | Step 9: Importing text >> |
| Top: Documentation Library | Up: Lesson 2: Designing a Menu |


