| << Step 6: Setting Text Attributes | Step 8: Creating multiple text columns >> |
| Top: Documentation Library | Up: Lesson 2: Designing a Menu |
Step 7: Positioning the text block
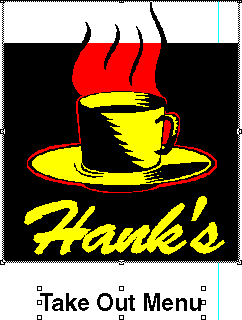
You will now align the text block you created in step 2 so that it is centered under the logo.
1. Select the logo.
Choose the ''Object tool'' and select the logo, if it is not already selected. When the object is selected, its coordinates will be shown in the ''Edit palette'' and object sizing handles will appear around the outer edge of the object at the corners and mid-points.
2. Lock the logo.
Choose ''Lock'' from the ''Object'' menu. This will prevent accidental movement of the logo, and enable aligning other objects to the logo without the logo moving.
3. Selecting multiple objects.
With the logo still selected, click on the text object while holding down the shift key.
4. Aligning multiple objects.
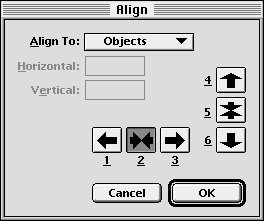
While the objects are both selected, choose ''Align'' from the ''Object'' menu. The ''Align'' dialog box will open. Click on the ''Center Horizontal'' button. This will center the unlocked text object horizontally. Click ''OK''.
Step 7: Positioning the text block Sub-Section url:PGSuser/lesson2#step7
created:2006-04-14 14:31:17 last updated:2006-07-05 20:03:33
Copyright © 1985-2025 GrasshopperLLC. All Rights Reserved.
| User Contributed Comments For Step 7: Positioning the text block | sign in to add a comment |
| There are no user contributed comments for this page. | |
| << Step 6: Setting Text Attributes | Step 8: Creating multiple text columns >> |
| Top: Documentation Library | Up: Lesson 2: Designing a Menu |


