| << Creating a Table of Contents | Common Questions >> |
| Top: Documentation Library | Up: Large Document Publishing |
Creating a Table of Figures
By marking figures and drawings in your document using figure marks, you can use PageStream to automatically create a table of figures for your document. The typical content of a table of figures starts with a title, then an alphabetic list of figure types with their figures sorted by location in the document. Each figure mark in a figure type category is numbered sequentially from the start of the document to the end.

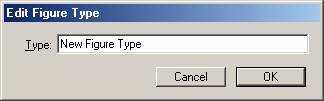
To add a figure type: Choose ''Figure Types'' from the ''Define'' submenu in the ''Edit'' menu to display the ''Define Figure Type'' dialog box. Click ''New''. The ''Edit Figure Type'' dialog box will appear. Enter the new figure type into the ''Type'' text box. Click ''OK''. Click ''Done'' to close the ''Define Figure Type'' dialog box. Note: The ''Define Figure Type'' dialog box can also be opened when inserting figure marks into the text.
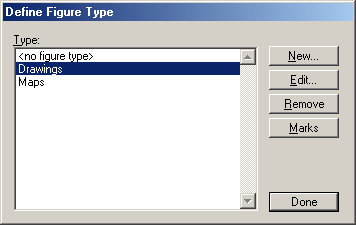
To edit a figure type: Choose ''Figure Types'' from the ''Define'' submenu in the ''Edit'' menu to display the ''Define Figure Type'' dialog box. Choose the figure type to edit from the ''Type'' list box. Click ''Edit''. The ''Edit Figure Type'' dialog box will appear. Enter the new figure type into the ''Type'' text box. Click ''OK''. Click ''Done'' to close the ''Define Figure Type'' dialog box.
To delete a figure type: Choose ''Figure Types'' from the ''Define'' submenu in the ''Edit'' menu to display the ''Define Figure Type'' dialog box. Choose the figure type to delete from the ''Type'' list box. Click ''Remove''. The figure type and figure marks will be deleted. Click ''Done'' to close the ''Define Figure Type'' dialog box.

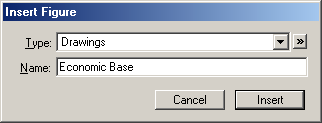
To insert a figure mark: Select the ''Text'' tool from the ''Toolbox'' and place the insertion point where the figure mark will be inserted. Choose ''Figure Mark'' from the ''Insert'' submenu in the ''Type'' menu. Choose a figure type, or ''<No Figure Type>'', from the ''Type'' pop-up menu. Enter the title for the figure into the ''Name'' text box. Click ''Insert.'' Note: If a new figure type needs to be created, choose the browse button to the right of the ''Type'' pop-up menu and the ''Define Figure Type'' dialog box will appear.
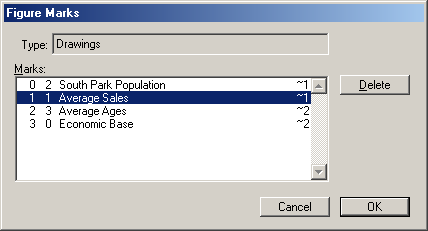
To delete a figure mark: Choose ''Figure Types'' from the ''Define'' submenu in the ''Edit'' menu to display the ''Define Figure Type'' dialog box. Choose the figure type from the ''Type'' list box. Click ''Marks''. The ''Figure Marks'' dialog box will appear. Choose the figure mark to delete from the ''Marks'' list box. Click ''Delete''. Click ''OK''. Click ''Done'' to close the ''Define Figure Type'' dialog box.
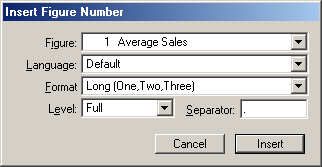
To insert a figure's number: Select the ''Text'' tool from the ''Toolbox'' and place the insertion point where the figure's number will be inserted. Choose ''Figure Number'' from the ''Insert'' submenu in the ''Type'' menu. Choose a figure from the ''Figure'' pop-up menu. Choose the display method for the number from the ''Format'' pop-up menu. When needed, choose the language for the long number display method from the ''Language'' pop-up menu when different than the default language for the text. Choose the number type ''Default'', ''Full'' or ''Current'' from the ''Level'' pop-up menu, and as required the text to use between levels in the ''Separator'' text box. Click ''Insert''.
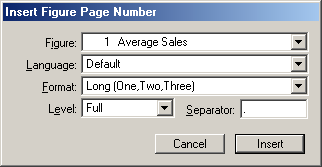
To insert a figure's page number: Select the ''Text'' tool from the ''Toolbox'' and place the insertion point where the figure's page number will be inserted. Choose ''Figure Page #'' from the ''Insert'' submenu in the ''Type'' menu. Choose a figure from the ''Figure'' pop-up menu. Choose the display method for the page number from the ''Format'' pop-up menu. When needed, choose the language for the long page number display method from the ''Language'' pop-up menu when different than the default language for the text. Choose the page number type ''Default'', ''Full'' or ''Current'' from the ''Level'' pop-up menu, and as required the text to use between levels in the ''Separator'' text box. Click ''Insert''.
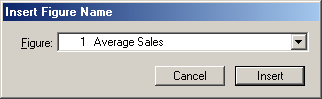
To insert a figure's name: Select the ''Text'' tool from the ''Toolbox'' and place the insertion point where the figure's name will be inserted. Choose ''Figure Name'' from the ''Insert'' submenu in the ''Type'' menu. Choose a figure from the ''Figure'' pop-up menu. Click ''Insert''.
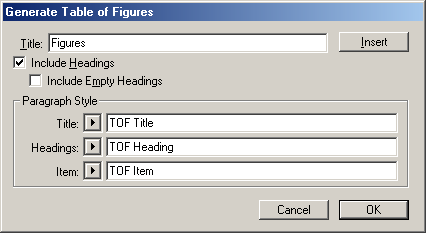
To create a table of figures: Select the ''Text'' tool from the ''Toolbox'' and place the insertion point where the table of figures will be inserted. Select ''Table of Figures'' from the ''Generate'' submenu from the ''Edit'' menu to display the ''Generate Table of Figures'' dialog box. Enter a title for the table of figures in the ''Title'' text box. Select ''Include Headings'' to include the figure type headings. Select ''Include Empty Headings'' to include figure types which have no corresponding figure marks. Select a paragraph style for the title, figure types and figure marks from the corresponding ''Title'', ''Headings'' and ''Item'' pop-up menu or enter them in the text boxes. Select ''Insert'' to generate and insert the table of figures at the current text cursor position. Click ''OK'' to save the settings without inserting the table of figures.
Creating a Table of Figures Sub-Section url:PGSuser/largedocpub#tof
created:2006-04-15 22:11:58 last updated:2009-01-16 22:28:38
Copyright © 1985-2024 GrasshopperLLC. All Rights Reserved.
| User Contributed Comments For Creating a Table of Figures | sign in to add a comment |
| There are no user contributed comments for this page. | |
| << Creating a Table of Contents | Common Questions >> |
| Top: Documentation Library | Up: Large Document Publishing |